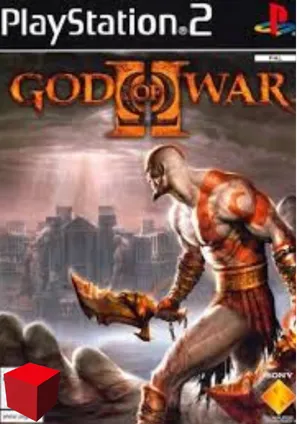
Download God of War for Nethersx2
Introduction
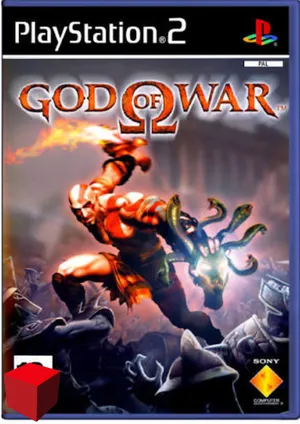
God of War is the 2005 action-adventure from Santa Monica Studio where you play Kratos, a Spartan warrior who takes on the gods of Olympus. It mixes fast combat with the Blades of Chaos, puzzles, platforming and button-prompt finishers. The original PS2 version can be played on Android using the NetherSX2 emulator.
This guide covers the original PS2 game, not the later PlayStation 4 title. Big battles and cutscenes can be demanding, so test performance in the busiest scenes.
| Detail | Info |
|---|---|
| Title | God of War |
| Genre | Action / Adventure |
| Developer / Publisher | Santa Monica Studio / Sony Computer Entertainment |
| Released | 2005 |
| NetherSX2 compatibility | Varies by device |
| Recommended format | ISO (or CHD to save space) |
| Game size | Varies by region and disc image |
How to Play God of War on NetherSX2
Follow these steps to set up and play the original PS2 version of God of War on your Android phone. You will need NetherSX2, a compatible PS2 BIOS, and a game image created from your own game disc.
Step 1: Install NetherSX2
Install a compatible NetherSX2 build on your Android phone, ready to run God of War. Open the app and follow the initial setup instructions, granting storage access when requested.
Step 2: Add a PS2 BIOS
Import a compatible PS2 BIOS dumped from a PlayStation 2 console you own. Select the BIOS in NetherSX2 if the setup process asks you to choose one.
Step 3: Prepare the Game File
Create a game image from your own God of War PS2 disc and save it in a folder NetherSX2 can access.
ISO is a common format, while CHD can save storage when supported by your build. Make sure the file is complete and for the correct region.
Step 4: Scan Your Game Folder
Open NetherSX2’s game directory settings and add the folder containing your game image. Allow the emulator to scan the folder, then check whether God of War appears in your library.
Step 5: Launch the Game
Tap God of War in your library to start it. The opening sequence is a good performance test, with large scenes and effects.
Use a Bluetooth controller or a well-planned on-screen layout, since combat and the button-prompt finishers need quick reactions.
Step 6: Adjust Performance Settings
Start with default settings and 1x Native resolution. If battles feel slow, test Vulkan or OpenGL, depending on your device.
Change one setting at a time and test in a large fight with many enemies.
Quick tip: If God of War does not appear in the library, check the selected game folder and file format. If it crashes or runs slowly, verify your BIOS setup and try the default emulator settings before experimenting with speed hacks.
Best NetherSX2 Settings for God of War
Apply these settings in God of War’s per-game settings so other PS2 games keep their own setup. Start with the defaults and only change what you need.
Renderer
Start with Vulkan if your device supports it. If you see glitches or crashes, test OpenGL and compare stability.
Resolution
Use 1x Native as your starting point. Try 2x only if big battles stay smooth and your phone doesn’t overheat.
Speed Settings
Keep the normal frame limiter on and leave speed hacks at their defaults at first.
If performance is poor, test a mild EE underclock or multi-threaded VU options one at a time, and revert any change that causes bugs or odd timing.
Controls
Combat, climbing and button-prompt finishers need quick input. Arrange on-screen buttons so attack, dodge and the action buttons are easy to reach, or use a Bluetooth controller.
Check that prompts stay visible and aren’t hidden by your touch layout.
Quick tip: Test in the largest battle you can reach and during a cutscene. Heavy effects and crowds are where slowdowns appear first.
Common God of War Issues & Fixes
Slowdowns in Big Battles
Cause: Many enemies and effects, high resolution or limited device power.
Fix: Use 1x Native, close background apps and test default speed settings before a mild EE underclock.
Black Screen or Crashes
Cause: A damaged game image, BIOS issue or incompatible setting.
Fix: Check your game file and BIOS, restore default settings and test Vulkan and OpenGL separately.
Graphics Glitches
Cause: Renderer compatibility or non-default graphics options.
Fix: Switch renderers and reset graphics settings to default.
Missed Button Prompts
Cause: Low frame rate, controller delay or a touch layout that hides prompts.
Fix: Return to default speed settings, use a lower-latency controller and rearrange the on-screen buttons.
Quick tip: Replay the same section after each change so you can compare results. Avoid stacking several speed hacks at once.